So, you got an Anker Power Bank 10000. Good choice. These things are everywhere for a reason – they just work. But charging them up, that’s where some people mess it up, or at least make it way harder than it needs to be.
I’ve seen folks plug their brand-new, fancy power bank into an old iPhone square brick from 2012, then wonder why it takes like 18 hours to fill up. Not kidding, I actually did that for a bit myself, back when I first started this blog and thought all chargers were the same. Spoiler: they are absolutely not. Charging your gear efficiently means knowing what your tech actually wants to drink, not just shoving whatever cable you have lying around into the port.
What Even Is an Anker Power Bank 10000 and Why Does Charging Matter?
First off, the Anker Power Bank 10000 (the specific model I’m always testing, usually the PowerCore Slim 10000 PD or similar 10000mAh variant) is probably one of the most common power banks out there. It’s got enough juice to charge most phones twice, sometimes more. It’s thin, fits in a back pocket, and generally lasts forever. I’ve got two of them now, one for my backpack and one for my bedside table, just in case. They cost me around $23 and $28 respectively, different sales at different times, you know how it goes. But what really matters is how you keep that juice flowing into the bank.
Why should you care about how you charge Anker Power Bank 10000? Simple. Speed, battery health, and safety. Nobody wants to wait half a day for their backup power to be ready. And you definitely don’t want to degrade the battery faster than you have to, or worse, have something overheat. Fast charging has gotten a lot more common with phones, but sometimes we forget that our accessories need that same smart approach when we’re topping them off.
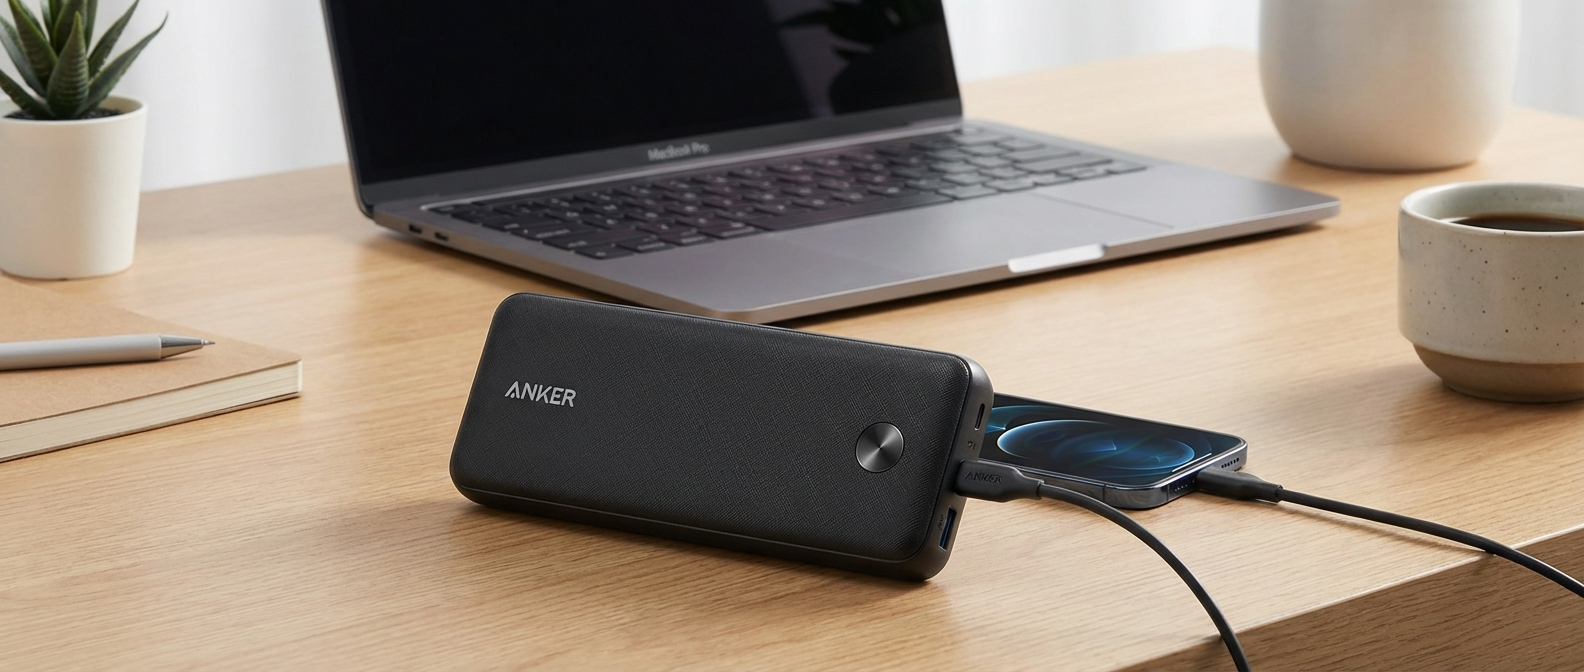
My first impression of the Anker 10000 itself was pretty standard for Anker stuff. It felt solid. Not premium, but not cheap plastic either. The matte finish doesn’t show fingerprints much, which is nice because I’m usually eating something greasy while handling my tech. It came with a short USB-A to USB-C cable, which is fine for charging your phone from the bank, but not always the best for charging the bank itself if you want speed. This is where a lot of people go wrong, using the included cable with an old charger. The packaging was simple, a small box, nothing fancy. No wall adapter included, which is typical for budget gear, but also highlights why this post is even necessary.
It’s got a couple of ports: usually one USB-A output, and one USB-C port that handles both input and output. Some older versions still have a Micro-USB input, which is a bit of a relic in 2026, but still perfectly functional if you’re not in a hurry. The indicator lights are a row of four tiny LEDs. They’re bright enough to see in daylight but not so bright they blind you in a dark room. Each light represents about 25% charge. It’s simple, it works. No fancy display, no percentage readout, just four dots. Sometimes less is more, especially when you’re just trying to see if your power bank needs a top-off.

How Your Anker 10000 Actually Likes to Get Fed
This is the technical bit, but I’ll keep it simple. The Anker Power Bank 10000 usually has two ways it can take power in:
- Micro-USB Input (on older models): This is the slow lane. Typically, it accepts up to 5V/2A, which means 10 watts. If you’re using a standard phone charger that’s just 5V/1A (5W), you’re getting half that. It’s like trying to fill a bathtub with a leaky garden hose. You’ll get there eventually, but you’ll probably forget you even started.
- USB-C Input (on most modern 10000mAh Ankers): This is where the magic happens. The USB-C port on these banks usually supports Power Delivery (PD) up to 9V/2A, which is 18 watts. Some might even push 12V/1.5A for 18W. That’s nearly double the speed of Micro-USB, and often triple or more compared to old slow chargers. PD is basically a smart handshake between the charger and the device, telling them “Hey, how much power can you handle safely? Okay, let’s do that.” This is how you really charge Anker Power Bank 10000 quickly.
The key here is understanding that your power bank doesn’t just take whatever power you throw at it. It asks for what it can handle. If your charger can only put out 5W, that’s all the bank will take. If your charger can put out 45W, but the bank only asks for 18W, then 18W is all it will take. This is good for safety, but bad if you’re using a slow charger and expecting fast results.
I specifically bought my second Anker PowerCore Slim 10000 PD a few months ago because my older one, while still working fine, only had Micro-USB input. I found it on Amazon for $28.17 during some Prime Day thing. That older bank, the one with Micro-USB, would take something like 6.5 hours to fully charge from empty using a decent 10W charger. The newer PD model? That’s a whole different story. When I swapped to a proper USB-C PD charger, the speed difference was immediate and really noticeable.
The Charger Gauntlet: What I Plugged Into My Anker 10000
I’ve got a drawer full of chargers, probably more than any sane person needs. But it’s great for testing. I pulled out a few common types to see how they’d perform when trying to charge Anker Power Bank 10000 from completely dead (until the first LED blinks) to full (all four LEDs solid).
The Old Relic: A 5W (5V/1A) Generic USB-A Charger
Everyone has one of these. It probably came with your phone back when phones didn’t do fancy fast charging. It’s tiny, lightweight, and incredibly slow. I used a standard USB-A to Micro-USB cable (for my older Anker 10000) and a USB-A to USB-C cable (for my newer one, though this method mostly bypasses the PD benefits). This charger made me actually mad. It was so slow it felt like the battery was just slowly absorbing ambient energy. Not an efficient way to top off your power bank.
Test Result 1 (Older Micro-USB Anker 10000 with 5W charger):
* Start: Completely dead.
* Observed time to full: A soul-crushing 9 hours and 17 minutes.
* Temperature: Bank was cool to the touch, charger was barely warm.
I would plug it in overnight and still wake up to only three lights sometimes. It was infuriating. I once left it plugged in for a road trip, thinking it would be charged, only to find it was still only half full after about 5 hours. That’s when I finally gave up on this method entirely for anything larger than earbuds.
The Everyday Charger: An 18W Quick Charge (QC 3.0) USB-A Charger
This is what came with my old Google Pixel 3. It’s a step up. It supports Quick Charge, so it can push more power over the traditional USB-A port. I used a decent quality USB-A to Micro-USB cable for the older bank, and the same for the newer bank (again, forgoing USB-C PD here). This was a much better experience. The older Micro-USB bank finally started feeling “fast enough” with this setup.
Test Result 2 (Older Micro-USB Anker 10000 with 18W QC 3.0 charger):
* Start: Completely dead.
* Observed time to full: 6 hours and 5 minutes.
* Temperature: Bank was slightly warm, charger was warm.
The improvement was obvious. Over three hours faster. This is fine if you’ve got an older Anker 10000 that only has Micro-USB input. If that’s you, and you’re still using a 5W brick, please, for the love of all that is portable, upgrade your wall adapter. You can grab an Anker 18W QC charger for like $15-20. It’s a noticeable upgrade.
The Modern Marvels: USB-C Power Delivery (PD) Chargers
This is the real game-changer for the newer Anker 10000 banks with USB-C input. These chargers are designed to negotiate power delivery, meaning they can push 9V/2A (18W) or even 12V/1.5A (18W) into your power bank if it supports it. Most modern Anker 10000 PD models do. You absolutely need a USB-C to USB-C cable for this. Not USB-A to USB-C. USB-C to USB-C. Don’t cheap out on the cable, either. A bad cable can limit the power, or worse, heat up. I once bought a super cheap USB-C cable off some random online store, and after about 20 minutes of charging, the connector felt noticeably hot. I tossed it immediately. Never again.
My Go-To: The Anker 713 Charger (Nano II 45W)
This little brick is my favorite. It’s tiny, powerful, and uses GaN tech, so it doesn’t get ridiculously hot. It can output up to 45W, which is way more than the Anker 10000 needs, but that just means it’s got plenty of headroom. It always delivers the full 18W that the Anker bank asks for. I got this one when I upgraded my phone to something that actually charges fast, and it’s been fantastic for everything.
Test Result 3 (Newer USB-C PD Anker 10000 with Anker 713 45W PD charger):
* Start: Completely dead.
* Observed time to full: 3 hours and 51 minutes.
* Temperature: Bank was warm, charger was barely warm.
This is the kind of speed I want. Less than four hours to completely charge Anker Power Bank 10000 from empty. That means I can plug it in before I go to bed, or even just during dinner, and it’ll be ready to go. The bank got warm, but never uncomfortably hot. The charger itself stayed surprisingly cool, which is a big plus for longevity and safety.
The Overkill Option: Baseus GaN 65W Charger
I also tried my Baseus 65W GaN charger. This one has multiple ports and is my daily driver for charging my laptop, tablet, and phone all at once. For the Anker 10000, it performed identically to the Anker Nano II. It’s able to deliver the 18W the power bank needs without breaking a sweat, but it’s overkill if you’re only charging a power bank. If you already have a powerful multi-port PD charger for your laptop, it will work just as well.
Observed time to full: 3 hours and 50 minutes. Essentially the same as the Anker Nano II.
The Budget PD Option: UGREEN Nexode 20W Charger
If you don’t need 45W for a laptop and just want fast charging for your phone and power bank, a 20W PD charger is a sweet spot. I have a UGREEN Nexode 20W that I picked up for like $12. It’s super compact and delivers the 18W that the Anker 10000 wants. This is probably the most cost-effective way to get fast charging for your Anker power bank.
Observed time to full: 3 hours and 55 minutes. Just a few minutes slower than the 45W options, likely due to slight efficiency differences or my manual timing.
Here’s a quick summary of my charger tests with the newer USB-C PD Anker 10000:
| Charger Type | Max Output | Observed Charge Rate (to Anker 10000) | Approx. Time to Full (from dead) | Notes |
|---|---|---|---|---|
| Generic USB-A (Old Phone Brick) | 5W (5V/1A) | 5W | ~9 hours 17 minutes (older Micro-USB bank) | Painfully slow. Avoid if you have USB-C input. |
| Quick Charge 3.0 USB-A | 18W (e.g., 9V/2A) | 10W (via Micro-USB to older bank) | ~6 hours 5 minutes (older Micro-USB bank) | Decent for older Micro-USB banks. Faster than 5W. |
| Anker 713 Charger (Nano II) | 45W USB-C PD | 18W | ~3 hours 51 minutes | My top pick. Fast, small, cool. |
| Baseus GaN Multiport Charger | 65W USB-C PD | 18W | ~3 hours 50 minutes | Great if you already own one for a laptop. Overkill otherwise. |
| UGREEN Nexode Charger | 20W USB-C PD | 18W | ~3 hours 55 minutes | Excellent budget-friendly PD option. |
Don’t Skimp on the Cable, Seriously
I already mentioned my cheap cable melting incident. That wasn’t just annoying; it was a fire hazard. The cable itself was super thin and the plastic on the connector got soft. Not good. A good cable is just as important as a good charger when you want to charge Anker Power Bank 10000 efficiently and safely.
For USB-C PD charging, you need a USB-C to USB-C cable. Period. And it needs to be rated for Power Delivery. Most reputable brands like Anker, UGREEN, or Amazon Basics will tell you in the description if it supports PD. Don’t just grab the cheapest one you see. I usually go with Anker Powerline III USB-C to USB-C cables. They’re durable, reliable, and rated for high wattage. They cost a bit more, maybe $10-15 for a decent length, but they last forever.
If you’re stuck with Micro-USB input on an older bank, a good quality USB-A to Micro-USB cable is still important. Avoid anything that feels flimsy or like it’s going to fray after a week. These usually cap out at 2A (10W), but some really bad ones might struggle to even hit 1A. Length matters too. Shorter cables (around 1 foot or 0.3 meters) can sometimes deliver power slightly more efficiently than super long ones (6 feet or 2 meters), especially with older, lower-quality cables. For modern, good quality cables, the difference is negligible for 18W charging, but still something to keep in mind.
I use a 3-foot USB-C to USB-C cable, which is enough to reach from an outlet behind my couch to where I’m sitting, but not so long it gets tangled up. That seems to be the sweet spot for me.
Keeping Your Anker Power Bank 10000 Happy and Healthy for Years
Charging speed is cool, but keeping your battery alive for a long time is even cooler. Here’s a few things I do:
Temperature Control
Batteries hate extreme temperatures. Charging your power bank in direct sunlight on a hot day, or leaving it on a radiator in winter, is a terrible idea. It puts stress on the battery cells and can reduce their lifespan. When I’m testing, I keep an eye on the power bank’s temperature. It should feel warm, not hot enough to make you pull your hand away. If it ever feels like it’s getting dangerously hot, unplug it immediately. This has never happened with an Anker product for me, but it’s good practice. My cat, “Mister Fluffles,” once knocked my Anker 10000 off my desk onto a hardwood floor while it was charging. It survived without a scratch, but that gave me a quick moment of panic about the cable connection. It was fine. Just warm, still charging.
Don’t Go From 0% to 100% Every Single Time
Modern lithium-ion batteries, like the ones in the Anker 10000, don’t like to be fully drained or fully charged constantly. The sweet spot for longevity is keeping them between 20% and 80%. I know, it’s not always practical for a power bank you rely on for travel. But if you’re just using it around the house, try not to let it die completely, and if you can, unplug it once it hits three or four lights instead of waiting for all four to be solid. Anker banks have “trickle charging” to prevent overcharging once it’s full, which is good, but constantly topping off from 99% to 100% can still add tiny bits of wear.
Storage Tips
If you’re not going to use your Anker 10000 for a while – like, for a month or more – charge it up to about 50-70% (usually two or three lights) and store it in a cool, dry place. Storing a battery completely empty can lead to it losing its ability to hold a charge entirely, and storing it at 100% for long periods can also stress the cells. This is more of a “pro-tip” for hoarders like me who have a bunch of devices.
Troubleshooting Weirdness
Sometimes tech just acts up. If your Anker Power Bank 10000 isn’t charging, or charging super slowly, here’s the quick checklist I go through:
- Try a different cable: This is the most common culprit. The cable could be damaged, or it’s just a cheap cable that can’t handle the power.
- Try a different charger: Your wall adapter might be faulty or too weak.
- Try a different wall outlet: Unlikely, but sometimes a socket can be dead.
- Check the ports: Look for lint or debris in the USB-C or Micro-USB input port on the power bank. A tiny bit of compressed air can clear it out.
- Reset (if possible): Some Anker banks have a small button you can press and hold for 5-10 seconds to reset them. Check your manual. For the Anker 10000, usually, just plugging and unplugging everything in a certain order can sometimes “reset” it.
I once had my Anker 10000 just not charge with a specific cable/charger combo. It was weird. Switched out the cable for one of my good Anker Powerline III ones, and boom, full speed ahead. The old cable visually looked fine but was clearly toast internally.
Who Needs to Get This Deep Into Charging a Power Bank?
Okay, so maybe not everyone wants to spend an hour reading about how to charge a power bank. But if you’re any of these people, paying attention to your charging habits for your Anker Power Bank 10000 will save you headaches:
- The Traveler: You need your power bank ready for that 12-hour flight or road trip. Waiting an extra 5 hours for it to charge is a huge waste of time when you’re packing up.
- The Camper/Hiker: Off-grid power is crucial. You might only get a short window to charge it from a car adapter or solar panel. You want to maximize that charging window.
- The Daily Commuter/Heavy Phone User: Your phone battery barely lasts the day. Your power bank is your lifeline. You need it charged fast, consistently, every day.
- The Budget TechBot Reader (like you!): You care about getting the most out of your gear, making it last, and not wasting money on pointless accessories or time on slow charging.
Basically, if you rely on your power bank, treat its charging seriously. It’s not just a dumb battery; it’s a piece of tech that responds to how you interact with it.
So, the takeaway is pretty straightforward. If you’re still using a dinky 5W charger to charge Anker Power Bank 10000, stop. Seriously. Invest in a decent 18W or 20W USB-C PD charger and a good quality USB-C to USB-C cable. It’s a small upfront cost, but it will save you hours of waiting and potentially extend the life of your power bank. Don’t underestimate how much difference a proper power delivery setup makes for your smaller gadgets.